Catalog
Preparation

Pre-installation checklist

  • LED Light Pod
  • Rubber Mounting Pad
  • Flat Washer
  • Lock Washer
  • Mounting Bolt
  • Hex Nut
1

Mounting & Adjusting Lights

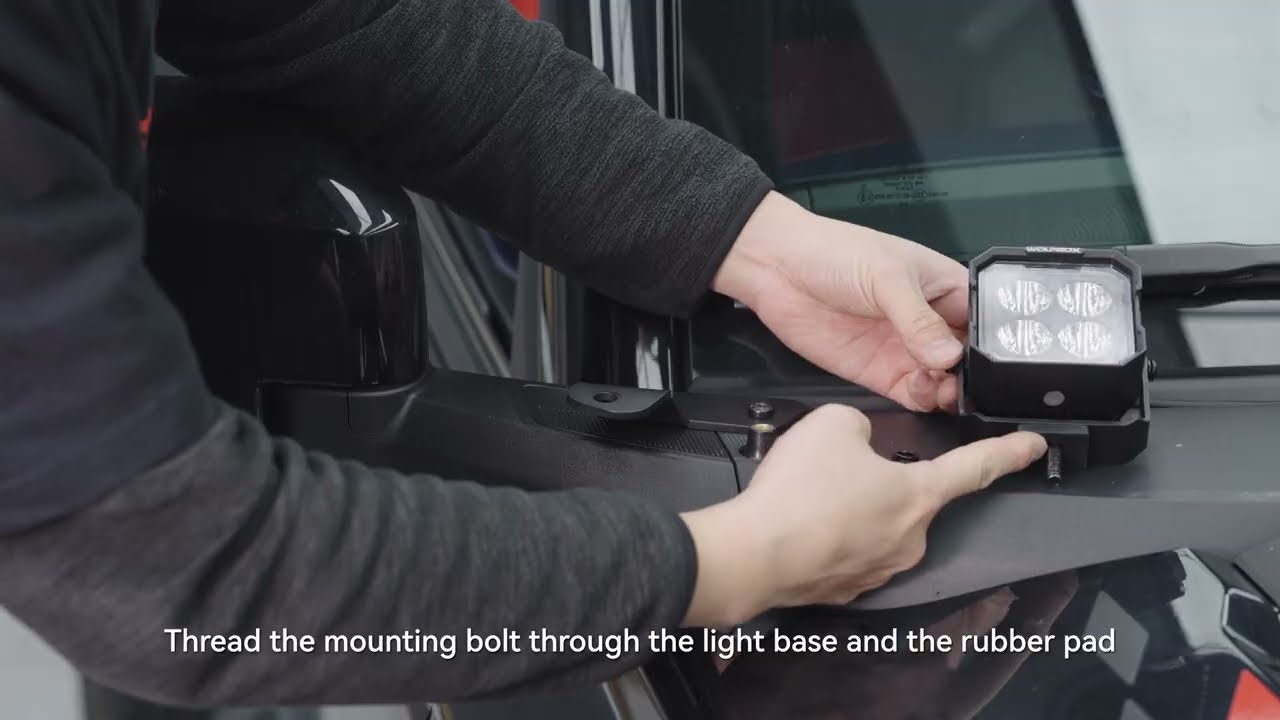
  • Initial Assembly: Thread the mounting bolt through the light base and the rubber mounting pad, then place the entire assembly into the corresponding mounting hole on your vehicle.
  • Secure the Lights: From underneath the mounting hole, install the flat washer and lock washer. Tighten the hex nut to secure the light in place. Repeat these steps for all other mounting locations.
  • Adjust Beam Spread: Tilt the light pod up or down to find the optimal beam spread for your driving needs.
  • Lock the Angle: Once the desired angle is set, use an Allen key to securely tighten the bolts on both sides of the U-bracket, locking the tilt angle in place.
2

Engine Bay Wiring

  • SAFETY FIRST Remove the Fuse: Before wiring, remove the included fuse from the wiring harness for safety.
  • Power Connections: Connect the red power wire to the positive terminal of the 12V battery. Connect the black wire to the negative battery terminal, or ground it to a bare metal part of the vehicle chassis.
  • Mount the Relay: Find a clear spot in the engine bay and securely mount the relay. Neatly organize the wiring in the engine bay and secure it with zip ties.
  • ACC Connection: Open the fuse box and locate the ACC fuse (switched power source). Wrap the red ACC trigger wire securely around the fuse leg, then plug it back into the fuse box.
3

Switch Routing & Mounting

  • Route the Switch Wire: Locate the firewall passage between the engine bay and the cabin, then route the switch wire through it.
  • Mount the Switch: Peel off the backing from the double-sided tape and mount the switch in a convenient location inside the vehicle.
4

Final Connections & Testing

  • Connect the Lights: Connect the DT connectors from the wiring harness to the pigtails on the back of the light pods.
  • Reinsert the Fuse: Finally, insert the fuse into the inline fuse holder on the wiring harness.
  • Final Test: Installation is complete! Turn on the switch to test the lights, and you are ready to go out and enjoy the off-road trails.
Vehicle Note: The vehicle demonstrated in the video is a Ford Bronco. Because wiring routes and mounting locations vary between different vehicle models, installing this system requires a certain level of DIY capability. Please plan the wiring route according to your specific vehicle and refer to the included product manual for core technical guidelines.
How to Install
NomadRover 3" LED Pods Installation Instructions
Download
NomadRover 5" LED Pods Installation Instructions
Download
NomadRover 7" LED Pods Installation Instructions
Download

Off-road lighting is categorized by beam pattern. The main types of off road lights include Spot (long-range), Flood (wide-spread), and Combo patterns. Selecting the best lights for off-roading depends on your environment—high-speed desert runs need Spots, while technical crawling requires Floods.

The primary benefits of using off road lights are increased safety and situational awareness. Factory headlights often fall short in total darkness; professional pods illuminate peripheral hazards and long-distance obstacles, giving you more reaction time on the trail.

No drilling required—it’s a 100% bolt-on design. Most owners can have it installed in about 30 minutes using just basic hand tools.

Generally, high-intensity off road lights are designed for trail use only and are not street legal when active on public roads. Most states require them to be covered or turned off while driving on pavement to avoid blinding oncoming traffic.

You should not use off road lights on the street unless they are specifically SAE/DOT-compliant fog lights. For the NomadRover series, we recommend keeping them for the dirt to ensure you stay compliant with local traffic laws.

When learning how to choose off road lights, consider three factors: Lumen output (brightness), Beam pattern (distance vs. width), and Durability (IP rating). For a versatile setup, a pair of 3" pods on the A-pillar is the perfect starting point for any build.