Catalog
Preparation

Tools Required

  • Plastic Trim Tool (or flat-head screwdriver)
  • Phillips Head Screwdriver (May be required)
  • Clean Cloth (For mirror & surface)
1

Remove Old Mirror

  • Use your vehicle's mirror controls to tilt the mirror glass all the way up, creating a gap at the bottom edge.
  • Gently insert your pry tool into the gap and slowly apply pressure to detach the mirror from the housing. You should hear "clicks" as clips disengage.
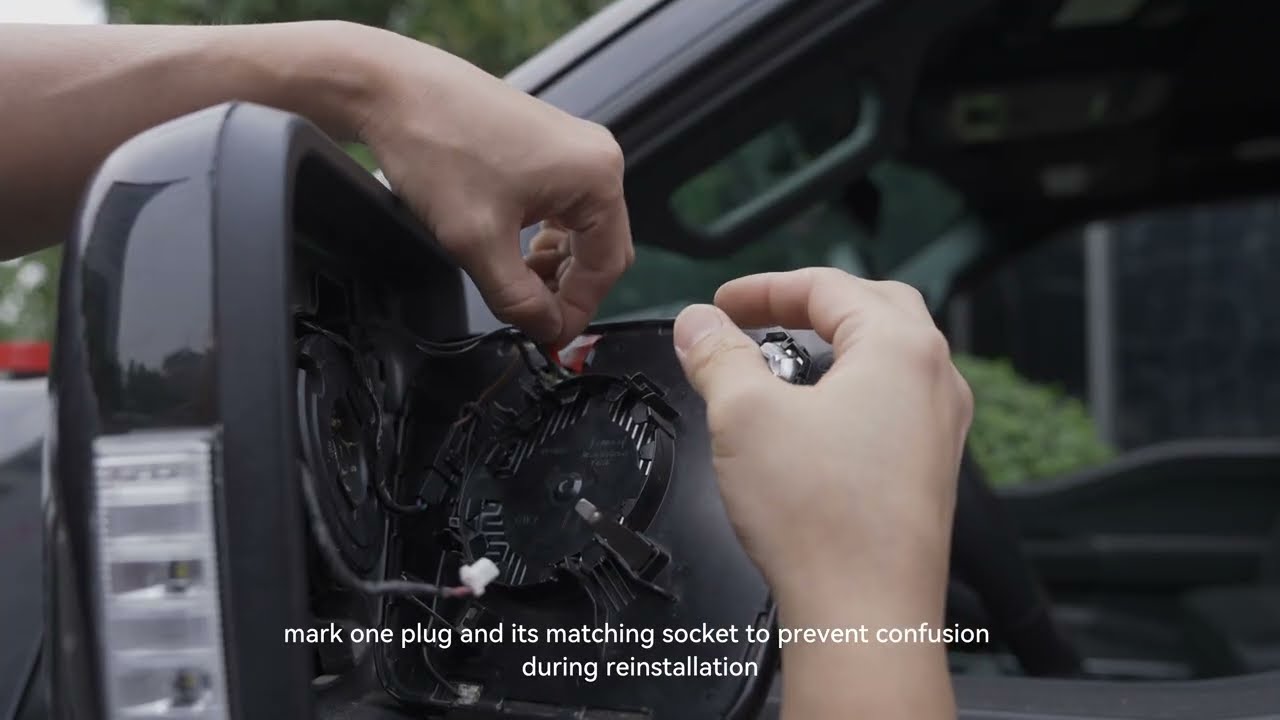
  • Carefully tilt the loosened glass forward. Gently unplug any Heating or Blind Spot Monitoring (BSM) connectors.
  • PRO TIP If two heater plugs look identical, mark one plug and its matching socket to prevent confusion during reinstallation.
2

Install New Mirror

  • Reconnect Wires: Reconnect the factory heater and BSM plugs securely to the new mirror. (Note: If your mirror has Sequential LEDs, leave those wires for Step 3).
  • Align Clips: Position the new mirror glass and carefully align the clips on the back with the slots inside the mirror housing.
  • Press to Secure: Using the palm of your hand, apply firm, even pressure to the center of the glass until you hear "clicks" indicating it is locked. Gently wiggle the glass to ensure no free play.
  • Test Functions: Test all adjusting functions (up, down, left, right) using in-car controls and verify Heater/BSM operations are working properly.
3

Wiring LEDs (If Equipped)

  • Access Wiring: Remove the mirror cap or housing to access internal wiring. Activate the turn signal for the side you are working on.
  • Red Wire (Power): Using a test light, probe the wires. The wire that flashes in sync with the turn signal is the positive (+) wire. Use the provided wire tap to connect the RED wire from the mirror to this signal wire.
  • Black Wire (Ground): For 2-Wire Systems, the remaining wire is the ground. Connect the BLACK wire from the mirror to this wire using a wire tap.
  • 3-WIRE NOTE Some vehicles have a spotlight wire. Turn on both spotlights and turn signals. The wire showing NO signal on the test light is the ground (-). Connect the BLACK wire to it.
!

Reassemble & Notes

  • Reassemble: Once the wiring is complete, reinstall the rearview mirror housing in the reverse order of removal. Finally, check the gaps in the housing to ensure it is installed properly.
  • Gentle Force: Apply gentle force during disassembly and installation, paying particular attention to protecting the mirror's heating wires and wiring harness to prevent breakage.
  • Clips Replacement: If any clips break during disassembly or installation, replace the corresponding parts immediately to avoid affecting the normal use of the rearview mirror.
Vehicle Note: The vehicle demonstrated in the videos is a 21+ Ford F-150. The installation steps for other vehicle models are generally similar. Please refer to your specific manual for exact details and variations.
General Install (See Manual for Specifics]
Wide-Angle Convex Side Mirrors Installation Instructions
Download

Yes. We don't do half-measures. Every box includes a complete pair: 1x Driver Side + 1x Passenger Side.

Absolutely not. We don't do stickers. This is a full replacement wide angle side mirror unit with a rigid backing plate. You pop your restrictive stock glass out and snap ours directly into the factory mirror base. It fits perfectly—no vibration, no gaps, and no "DIY look."

It’s the difference between "guessing" and "knowing." Our custom convex side mirror expands your field of view by roughly 30-40%. You’ll see the lane next to you and the car sneaking up on your rear fender. Tunnel vision: Deleted.

No. You keep the tech that matters. We engineered our backing plates to be 100% compatible with your truck’s systems.

Real talk: You will disconnect the electronic auto-dimming, but you won't miss it. To achieve this level of wide-angle clarity, the thick electronic layer had to go. Instead, our Nano-Coated Blue Glass provides optical anti-glare that filters high beams naturally—without the lag of electronic sensors.

Negative. If you can pop a cap off a beer bottle, you can install these. Most drivers get it done in 10-30 minutes using a simple pry tool. No drilling, no cutting, and no electrical degree required.

It’s a trade-off for safety. The R1200 convex curvature captures a much wide view than flat glass, effectively eliminating blind spots. As a result, objects in the mirror are closer than they appear. We recommend taking time to adjust to the new depth perception before attempting aggressive maneuvers.

These mirrors are designated for OFF-ROAD USE ONLY. Because our advanced R1200 panoramic optics and integrated LED signals are engineered to maximize performance beyond standard factory specs, they may not meet specific FMVSS 111 regulations (which often require flat glass on the driver's side). We engineered this wide angle side mirror to dominate the trail, but it is the user's sole responsibility to check local laws and determine legality before using them on public highways.

Yes. WOLFBOX convex side mirrors include a 3-year warranty for your peace of mind.