

🛠️ Preparation


![]()
1
Unboxing & Inventory
- ● Carefully unpack everything and verify all parts are present and undamaged before you start tearing into your truck.
- ● Keep all the packaging around until the installation is completely finished.
2
PREP & DRILLING
- ● Remove Front Utility Track: Remove the front bed utility track (7 T30 bolts + plastic tabs). Pull back firmly to pop it out. It will not be reinstalled.
-
●
Install Threaded Blocks: Remove the plastic cap at the end of the side mounted utility track and slide in six (6) 8mm threaded mount blocks per side.
*(If your truck doesn't have side tracks, install the included replacement tracks first).* - ● Front Drain Holes: Measure 4" (100mm) from the side and 3 1/4" (85mm) up from the base. Use a 19mm hole saw to drill the holes into the raised vertical ribs on both sides.
- ● Power Harness Hole: (Driver Side Only) Measure 4" (100mm) from the side and 6 1/8" (155mm) up from the base. Use a 16mm (5/8") drill bit to drill the hole. Caution: Use a drill stop!
- ● Rear Drain Holes: Drill one 19mm hole on each side, located in front of the raised section at the rear of the bed.
3
APPLY WEATHER SEALS
- ● Clean Surfaces: Thoroughly clean the top of the plastic bed caps and the top of the front bed bulkhead of any dirt or debris.
- ● Hard Foam Seal: Install the front bulkhead seal (hard foam seal) straight across the top of the front bulkhead.
- ● Soft Foam Seals: Install the water-resistant seals (soft foam seals) across the top of the front bulkhead (right on top of the hard seal) and along the plastic bed caps. Position them as close to the inner edge of the bed as possible and trim off any excess.
- ● Mastic Tape: Cut a piece from the included mastic tape roll, rub it into a strip with your hands, and press it firmly into the corners of the front bulkhead to improve water resistance.
⚙️Canister & Side Rails Assembly
4
INSTALL MOTOR
-
●
Place the canister upright on level ground and find the motor mounting spot on the driver's side.
-
●
Attach the motor clutch handle and pull it upward to disengage the motor.
-
●
Slightly pull the tonneau cover out from the canister to align the motor arm with the internal rotating shaft.
-
●
Route the wiring harnesses under the motor and secure it to the canister using the three 6-1.00 x 20mm Torx combo bolts.
-
●
Temporarily remove the two T30 Torx bolts from the canister, line up the motor cover, and then reinstall and tighten them.
5
INSTALL SIDE RAILS
-
●
Unwrap the side rails and identify the driver and passenger sides; the driver side rail has the operating buttons at the end.
-
●
Lift the clutch handle to disengage the motor, carefully pull the cover out, and ensure the stopper sits in front of the limit block.
-
●
Align the side rail with the canister and slide it in, making sure the cover slats slide smoothly into the rail channel.
-
●
Ensure the rail sits flush on the canister, secure it with three 6-1.00mm x 20mm T30 Torx bolts, and repeat for the other side.
-
●
Pull the clutch handle back downward to engage the motor.
6
INSTALL CANISTER COVER PLATE
-
●
Position the cover plate on top of the canister so the mounting holes line up perfectly.
-
●
Drop a plastic ring into each hole and secure the plate to the canister using the four 5mm x 10mm countersunk screws.
-
●
Apply the Adhesion Promoter to the indicated area on the side rail rubber strip.
-
●
Peel the backing off the weather seal strips and press the cover plate rubber strip tightly together with the side rail rubber strips.
⚡Wiring & Routing


![]()
6
CONNECT WIRE HARNESS
-
●
All wire harness leads are labeled and have unique male/female connections. Connect the two large connectors on the ECU main harness to the bottom of the ECU.
-
●
Identify the smaller leads on the ECU main harness and connect each one to the corresponding lead on the tonneau cover/side rails. Ensure they click into place.
-
●
Use the fastening buckles to organize the wire harness neatly inside the canister area.
-
●
Important: The connector for the power harness will remain unplugged at this time.
7
ROUTE THE POWER HARNESS
-
●
Dedicated Routing Hole: The tonneau cover power harness must be routed out through the 16mm (5/8") hole on the driver side of the bed that was drilled previously in Step 2.
-
●
From there, the harness will travel down the length of the vehicle frame, up into the engine bay, and to the vehicle battery on the passenger side.
-
●
Using wire ties, secure the wire harness so it does not come into contact with moving parts or exhaust pipes. Keep it as high as possible along the frame to prevent damage.
-
●
Leave about 1.5ft of the power harness loose in the bed.
-
●
Open the fuse holder cap, remove the fuse, and then connect the positive power harness connector to the main power harness. Do not connect the power harness to the vehicle battery at this time.
🔌Bed Installation & Alignment


![]()
9
INSTALL TONNEAU COVER
-
●
HEAVY LIFTING: With assistance, carefully lift the tonneau cover assembly and place it on top of the truck bed.
-
●
Do not slide the tonneau cover along the bed as this will damage the foam seals you installed earlier.
-
●
Leave the front of the tonneau cover about 1ft from the front of the bed and connect the power harness to the connector on the ECU main harness.
-
●
Carefully lift the tonneau cover and position it as far forward as possible. Be careful not to pinch the wire harness. Leave a small gap between the canister and the front of the bed.
10A
BRACKETS (FACTORY TRACKS)
-
●
Start on the driver side. Insert three (3) 6mm T-channel blocks into the bottom channel of the side rail and space them evenly.
-
●
Position the three (3) mount brackets to align with the 8mm threaded blocks you slid into the factory utility track during Step 2.
-
●
Use one (1) 6-1.00mm x 16mm T30 Torx bolt to attach each mount bracket to the side rail.
-
●
Use two (2) 8-1.25mm x 25mm T40 Torx bolts, lock washers, and flat washers to attach each mount bracket to the 8mm threaded blocks inside the utility track.
-
●
Important: Leave all hardware loose. Position the front bracket as far forward and the rear bracket as far backward as possible. Repeat for passenger side.
10B
BRACKETS (NO FACTORY TRACKS)
-
●
Start on the driver side. Insert three (3) 6mm T-channel blocks into the bottom channel of the side rail.
-
●
Align the blocks with the mount points on the replacement tracks (installed during Step 2).
-
●
Use one (1) 6-1.00mm x 16mm T30 Torx bolt to attach each of the three (3) mount brackets to the side rail.
-
●
Attach each mount bracket to the bed side using two (2) 8-1.25mm x 25mm T40 Torx bolts, flat washers, lock washers, and two (2) 8mm threaded mount blocks.
-
●
Important: Leave all mount bracket hardware loose at this time. Repeat this process for the passenger side.
11
ALIGN THE SIDE RAILS
-
●
Check Parallelism: Snap the included calibration bar into the inner channels of both side rails. Slide it from front to back to make sure the distance between the rails is exactly the same all the way down.
-
●
Center the Assembly: Measure from the outside of the side rails to the outer edge of the truck bed to ensure the whole setup is perfectly centered. Nudge the ends of the rails as needed until dialed in.
-
●
Lock It Down: Once perfectly aligned, push down firmly on the rear of the side rails and tighten down the rear bracket hardware. Double-check your measurements with the calibration bar, then push down and lock in the center and front brackets.
-
●
The Final Polish: Pull the motor clutch lever up to disengage the motor, then manually pull the cover open and closed. It should glide smoothly. If it binds or feels rough, loosen the brackets and tweak the alignment until it's buttery smooth.
🔩Finalizing & Powering Up


![]()
11
INSTALL DRAIN TUBES
-
●
Attach the front drain tube adapters to the front drain tubes and secure them with the supplied tube clamps.
-
●
Carefully thread the drain tube adapters into the mounting holes on the bottom of the canister. Don't overtighten, or you might crack the plastic fittings!
-
●
Feed the other end of the front drain tubes through the holes you drilled in the bed's plastic plugs back in Step 2.
-
●
Slide the rear drain tubes onto the drain outlets at the tailgate end of the side rails (you may need to loosen the pre-installed clamps a bit first).
-
●
Route the bottom of the rear drain tubes through the holes near the top of the bed, then snug up the clamps. Again, don't overtighten!
Note: The two drain pipes on the left and right of the tailgate can be optionally installed based on your needs, and it will not affect normal drainage.
12
FINISH INSTALLATION
-
●
Do a final pass with your tools and double-check that all bracket mounting hardware is securely tightened.
-
●
Make sure the motor is fully engaged. Push the clutch lever down, then tug on the end of the tonneau cover until you hear it "click" into place.
-
●
Install the block-off panel on the driver's side of the canister. Slip the top tab into the motor cover slot, pull down to secure it, and thread the knob into the bottom hole to lock it tight.
-
●
Pop the hood and locate your battery. Attach the positive and negative ring terminals of the power harness to the corresponding battery posts.
-
●
Once hooked up, plug the fuse back into the holder and press the cap down until it locks. Secure any loose wires in the engine bay with zip ties to keep them safely away from hot or moving parts.
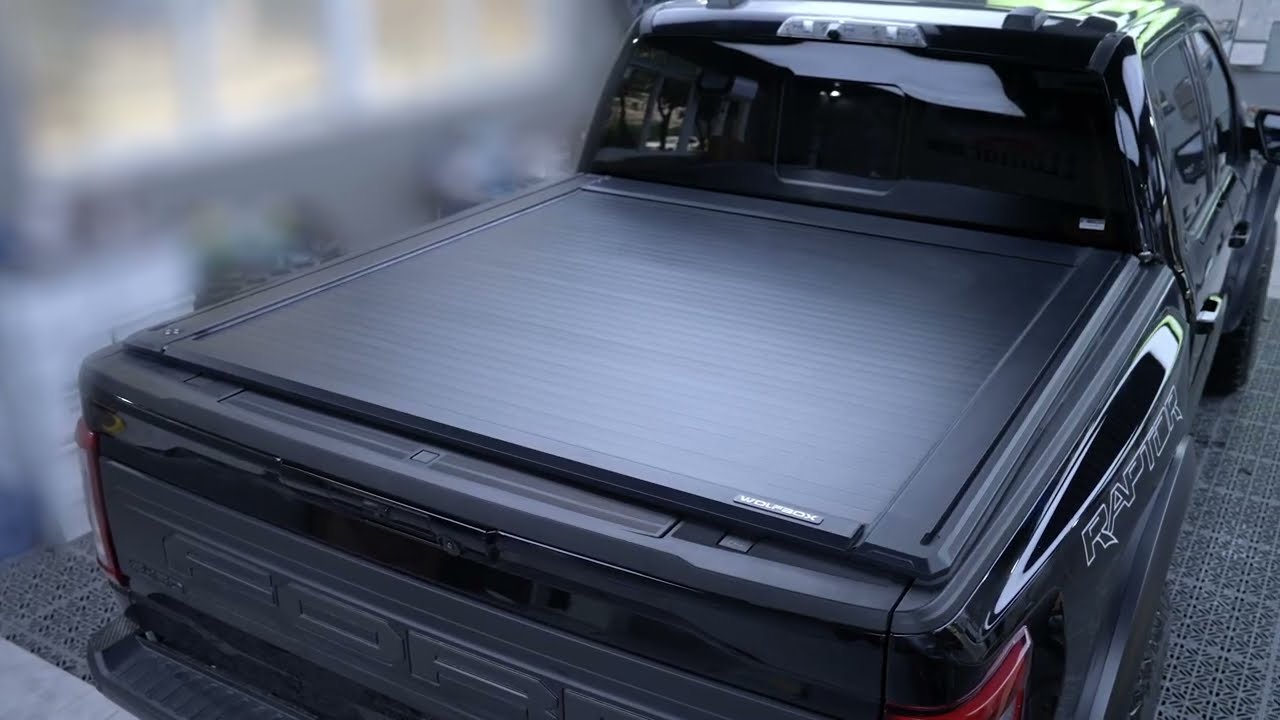
General Install (See Manual for Specifics)
You have four ways to operate your electric tonneau cover:
Side Rail Button: Automatically unlocks when your key fob (PKE) is nearby or when your phone connects via Bluetooth.
Remote Key Fob: Open it from up to 65 ft away.
Mobile App Control: Full control via Bluetooth (up to 65 ft).
Emergency Escape Button: Built-in safety release accessible from inside the bed.
No fumbling required. Thanks to PKE (Passive Keyless Entry) technology, the tonneau cover buttons automatically wake up and unlock when your key fob is within 3.2 ft, or your phone connects via Bluetooth. Just walk up and press. It knows it's you.
We’ve got your back. There is a dedicated Emergency Escape Button located on the canister housing inside the bed. A simple double-click releases the truck bed cover instantly. Safety comes standard.
Virtually impenetrable. The integrated lock has zero external keyholes, eliminating picking risks entirely. The heavy-duty interlocking slats create a seamless surface that resists prying, while the retractable tonneau cover stays deadlocked to everyone but you.
As bone-dry as physics allows. We use automotive-grade seals and integrated drain tubes to create a fortress against rain, snow, and car washes. While no retractable truck bed cover is technically "submersible," this keeps your flour bags dry in a downpour.
Absolutely. It’s built for it. The integrated T-slot rails allow you to mount crossbars, bike racks, and cargo baskets above the tonneau cover. You get full secure storage below and infinite expansion up top.
Work bright, play cool. It features dual-mode LED lighting. Open the truck bed cover, and high-intensity white light floods the bed automatically. Want to show off? Use the App to switch to RGB mode and customize the vibe.
